FINALIZING RESTORATION OF 1920’s WICKER CHAIR
- Preparation for prime and finish coats
- Coat worn wicker surfaces with water thinned Elmer’s Glue-All [thinned at 1 : 1] using a 1” to 1-1/2” brush. Let dry overnight.
- Re-clean and vacuum entire chair. Take time during this final cleaning to ensure all repairs have been completed.
- Apply Primer
- Prime entire chair with RUST-OLEUM, “Painter’s Touch Ultra Cover 2x Primer Spray”.
- Apply primer to the new work at normal spray distance to ensure a balanced coat. Back off a little with the spray while priming the original material.
- Allow a minimum of 2 hours drying time.
- Apply Top Coat
- Finish chair using high quality oil based gloss enamel paint.
- Apply material with a combination of various types of brushes.
- Work only in controlled areas. When an area is complete, clean brushes.


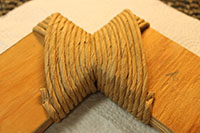
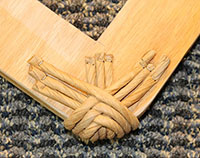
Fibre Rush Corners

Step 1

Step 2
Step 3

Step 4

Step 5